
Introduction
Many homeowners ask whether a garage door installation suits a competent DIY approach. The answer depends on the door type, the condition of the opening, and the tools and lifting help available. Sectional and roller doors often require precise alignment, secure fixings, and careful spring or motor set-up, which can affect safety and reliability. UK guidance on safe manual handling and home improvements also applies; see the Health and Safety Executive (HSE) for practical advice. This guide explains what to expect, common risks, and when a professional installer makes better sense.
Assessing whether a DIY garage door installation suits your property and skills
A DIY garage door installation suits some properties, yet the decision should start with an honest check of the opening and the door specification. Measure the width, height, and side room, then confirm that the lintel and jambs sit square and sound. Cracked masonry, rotten timber, or an uneven floor can force packers and extra fixings, which often reduces reliability and weather sealing.
Skill and equipment matter as much as measurements. A typical installation needs accurate drilling into masonry or steel, safe ladder work, and confident use of a spirit level and torque settings for fixings. Plan for controlled lifting, since door panels, tracks, and operators can exceed safe one-person handling limits. If the door uses springs or a tensioned counterbalance, treat set-up as a high-risk step; incorrect tension can cause sudden movement, damage, or injury.
Consider compliance and aftercare before starting. A powered door needs a suitable electrical supply and correct safety features, such as force limitation and photo eyes where specified. When uncertainty remains, a local specialist such as Garage Doors King’s Lynn can advise on suitability, parts, and fitting standards for your property.
Choosing the correct garage door type, size, and operating method
Start by matching the door type to the garage structure and how the space is used. Up-and-over doors suit many traditional openings, yet they need clear space in front of the garage as the panel swings out. Sectional doors open vertically and track along the ceiling, which helps when the driveway sits close to the door. Roller doors coil into a compact box above the opening, which can suit low headroom, although the curtain and guides demand accurate alignment to avoid jamming. Side-hinged doors provide simple access for bikes and bins, but the leaves need sound frames and level thresholds to prevent binding.
Next, confirm the correct size using the manufacturer’s measuring method rather than relying on nominal door sizes. Measure the structural opening width and height, then check the “side room” (space beside the opening), headroom (space above), and backroom (depth into the garage). Take diagonal measurements to confirm the opening sits square, since a skewed aperture can cause uneven gaps and poor sealing. Where guidance refers to safe clearances and fixings, follow the relevant British Standard for industrial and domestic garage doors, BSI BS EN 13241, as a benchmark for performance and safety expectations.
Choose the operating method with daily use and security in mind. Manual doors cost less and avoid electrical work, yet they still rely on correctly set springs and smooth tracks. Electric operators add convenience and can improve security, but they require a suitable power supply and safe set-up of force limits and safety features. If the door will be automated, select a door designed for automation and confirm compatibility with the operator. For example, Hörmann and Garador publish door-specific sizing and automation guidance that helps prevent mismatched components and unreliable operation.
Tools, fixings, and safety equipment required for installation
A typical installation needs accurate measuring and marking tools, including a tape measure, spirit level, square, chalk line, and a pencil or marker. Use a suitable drill/driver with masonry bits for brickwork, plus wood bits for timber frames. A socket set and spanners help with track brackets and spring fittings, while screwdrivers and hex keys cover common fasteners. Keep packers and shims to hand to correct minor irregularities without forcing components out of line.
Select fixings that match the substrate and the door weight. For sound masonry, use quality expansion anchors or concrete screws; for timber, use structural wood screws of the correct length and gauge. Galvanised or stainless-steel fixings reduce corrosion in damp garages. Follow the door manufacturer’s specified bolt grades and do not substitute unknown hardware, as spring and track loads can exceed expectations.
Safety equipment matters as much as tools. Wear safety glasses, cut-resistant gloves, and steel-toe footwear, and use hearing protection when drilling. A stable step ladder and a second person reduce manual handling risk; guidance from the Health and Safety Executive (HSE) helps when planning lifts. If the door uses torsion or extension springs, treat stored energy as a serious hazard and use only the specified winding bars and locking pliers.
Preparing the opening, frame, and floor for accurate alignment
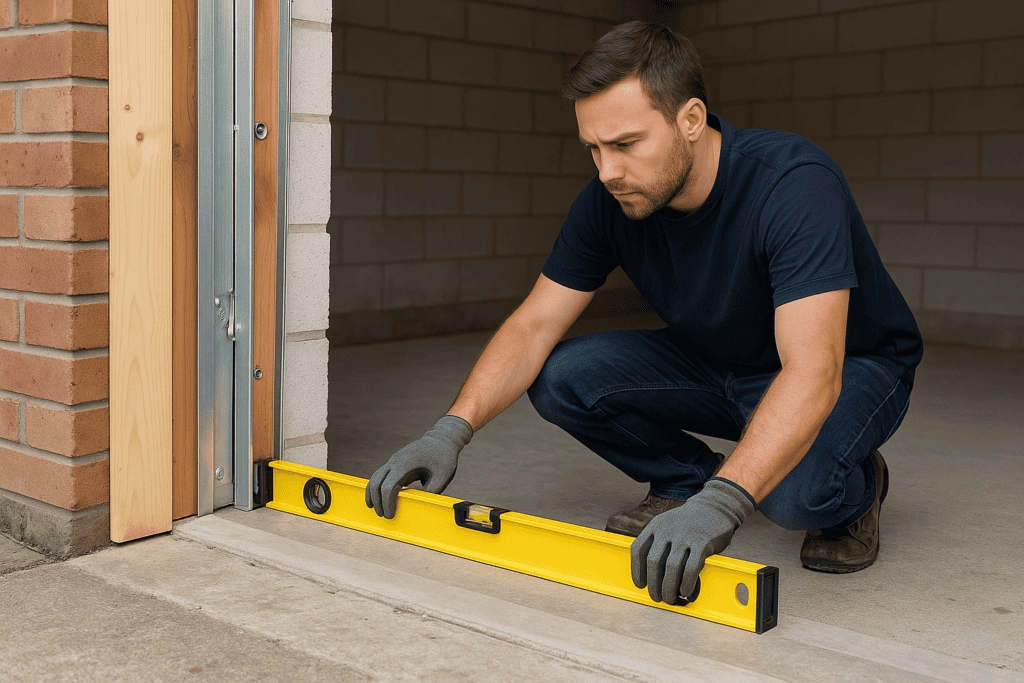
Accurate alignment starts with a clean, stable opening. Remove loose render, flaking paint, and old fixings so brackets sit flat. Check the jambs and lintel for square by measuring diagonals; matching measurements indicate a true rectangle. Confirm plumb on both sides with a spirit level, then mark a consistent datum line across the opening to reference track and frame positions.
Inspect the floor where the bottom seal will land. A sloping or pitted threshold can create gaps that admit water and draughts, so identify high spots and low spots before fixing any side frames. Use packers to correct minor variation and keep fixings tight to solid material, not crumbling mortar. Where the floor falls away, plan a suitable threshold strip or levelling compound that suits the garage use and local drainage. For safe handling and site preparation, follow guidance from the Health and Safety Executive (HSE).
Step-by-step fitting sequence: tracks, panels, springs, and opener setup
Follow the manufacturer sequence exactly, as the order affects alignment and spring tension. Keep fixings finger-tight until the door runs freely, then torque them to the stated setting.
1) Fit the vertical and horizontal tracks
Offer up the vertical tracks to the jambs and set the correct offset from the opening, using the supplied brackets and packers where needed. Check plumb on each side, then confirm that both tracks sit at the same height. Next, install the horizontal tracks and rear hangers. Set the horizontals level, parallel, and square to the opening so the rollers do not bind. Tighten the track joints only after a final check of diagonals and clearances.
2) Hang panels and set roller positions
Start with the bottom panel and seat the weather seal evenly on the floor. Fit hinges and rollers, then lift the next panel into place and connect the hinges as specified. Continue upwards, checking that panel edges align and that rollers sit centrally in the track. Adjust roller carriers to remove side-to-side play without forcing the door against the track. Before moving on, raise and lower the door by hand to confirm smooth travel and even gaps.
3) Install and tension springs with care
Springs store high energy and can cause serious injury if handled incorrectly. Use only the correct winding bars and follow the door manual step-by-step. For torsion systems, set the shaft, drums, and cables, then apply the stated number of turns and lock the set screws. For extension systems, fit safety cables through the springs and set the pulley path as shown. Test balance by lifting the door to waist height; a balanced door should stay in place with minimal drift.
Stop and seek professional help if the door lifts unevenly, cables slacken, or the spring hardware shifts under load.
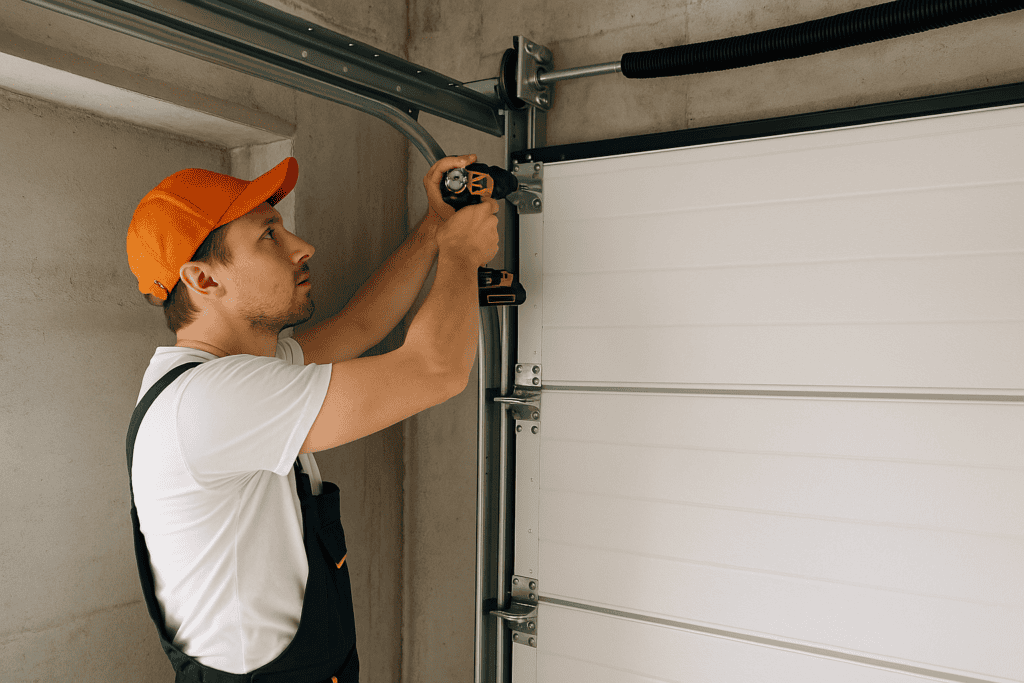
4) Mount and set up the opener
Fix the opener to sound structure, not plasterboard. Align the rail with the door centreline and set travel limits so the door seals without crushing the bottom rubber. Set the safety reverse and photo-eyes, then test using a solid object on the floor. For guidance on safe powered-door features, refer to HSE advice on home safety and manual handling principles.
- Recheck all fasteners after 10–20 cycles.
- Lubricate rollers and hinges with a suitable garage-door lubricant, not grease.
- Confirm locks and emergency release operate cleanly.
Testing, adjustment, and compliance checks after installation
After fitting, test the door through several full open and close cycles. Listen for scraping, binding, or sudden changes in speed, as these often point to misaligned tracks, loose brackets, or incorrect roller spacing. Check that the door sits level on the floor and that the bottom seal contacts the threshold evenly. If gaps remain, adjust the track position or the stop settings rather than forcing extra spring tension.
Confirm that the door stays in place when left half open. A door that drops or rises indicates poor balance, which can overload an opener and increase wear. For powered doors, set the travel limits and force controls to the manufacturer values, then test the safety reverse and photo-eye alignment. Refer to the official guidance from Garage Door Safety for safety checks and common hazards.
Finish with compliance checks. Verify that fixings suit the substrate, cables sit correctly on drums, and all guards and warning labels remain in place. Keep the installation manual and record the final settings for future servicing.
FAQ
Can I fit a garage door myself?
Yes, many competent DIY installers can fit a garage door, provided the opening is sound and the instructions match the exact door model. The main risk sits with spring systems and heavy panels, which can cause serious injury if handled incorrectly. If the door uses torsion springs, consider using a qualified installer unless the manufacturer supplies a safe, clearly described method and the correct winding tools.
Do I need Building Regulations approval?
A standard replacement door often does not need approval, yet electrical work for an opener must meet safety rules. If you are unsure, check guidance from GOV.UK. For electrical connections, use a competent person and follow current UK wiring requirements.
How long does installation usually take?
Time varies by door type and site condition. Many DIY installations take a full day with two people, while complex sectional doors or automation can extend into a second day. Allow extra time for careful alignment and repeated test cycles.
What are the most common DIY mistakes?
Mis-measuring the opening, fixing tracks out of plumb, and tightening brackets before the door runs freely cause most problems. Incorrect spring tension can also lead to a door that drops, shoots up, or strains the opener. Follow the manufacturer torque settings and do not substitute fixings unless the instructions allow it.
Can I automate an existing manual door?
Often yes, but the door must be balanced and compatible with the drive type. A poorly balanced door can overload the motor and reduce service life. Check the opener guidance from the manufacturer, such as Hörmann or Chamberlain, and confirm that safety features such as force limitation and photo sensors are supported.
When should I stop and call a professional?
Stop if you find cracked lintels, rotten frames, persistent binding after adjustment, or any uncertainty around spring handling. A short site visit can prevent damage to the door, the garage structure, and the installer.